Showing posts with label recipe. Show all posts

Sunday, 11 March 2012

Frangipane and jam tarts

Well it seems life got in the way of blogging recently. I can't pretend I've been doing anything glamorous; I've mostly been working, baking some more of my blueberry cupcakes and trying to arrange exciting things for the upcoming months. At the end of the month I'm off to see some of my best friends in Bath and then next month I'll be off to Cardiff for some welsh based fun. Catching up with old university friends is one of my favourite things. I love seeing what they've been up to. The best thing is realising that despite not seeing them all the time, we can slide straight back into old ways and have a great time together. I'm also going to be heading to V Festival in August. Ridiculously excited!

 Today I wanted to share a recent baking beauty. Frangipane and jam tarts sound much more difficult than they are. They only take about 20 minutes in all and then you get a good looking desert to show off! This is another success from my boyfriend and I can't take the credit. I can definitely share the recipe though!


What you will need:
Raspberry or strawberry jam
Pre-made sweet pastry cases
Frozen summer fruits
1 orange
Caster sugar
Icing sugar

For the frangipane:
100g butter unsalted
100g ground almonds
100g caster sugar
1 egg
Orange zest
Vanilla extract

What to do:
Heat the oven to about 180C.

First, make the frangipane: mix all frangipane ingredients together. Leave the butter out to soften at room temperature first.

Put a spoon of jam in each case, then a spoon of frangipane, then jam, and then more frangipane!

Brush egg around the case to keep it from burning in the oven and also to give it a nice golden glow

 Put the tarts in the preheated oven for 15-18 mins

While the tarts are baking, you can make the sauce. This will only take a couple of minutes. In a saucepan add a generous squeeze of orange juice, some frozen summer fruits (blackberries, redcurrants etc) and a good sprinkling of sugar. Allow this to heat in the pan until sauce like. Taste it to check it is sweet enough for you. If not, then add more sugar.

When the tarts are done, whip them out of the oven.

Put them on a place and add the sauce. Sprinkle icing sugar over the top and voila! 


Tuck in and enjoy. 


Sunday, 26 February 2012

Oaty banana cookies

Baking on a Sunday is such a brilliant thing. I can listen to some music and mix up a treat at the same time. Today I decided to make some Banana Oatmeal cookies because 1) they have very few ingredients, 2) they are very easy to make and 3) I am trying to have a healthy week and these were my chosen treat!

To make these cookies you will need:

4 ripe bananas
230g oatmeal
150g chopped dates
50g chopped pecans
50g sugar
100ml vegetable oil
1 tsp vanilla extract
3/4 tsp salt

If you dont want to use pecans then you could always replace them with hazelnuts or walnuts, depending on your preference.

What I did:

Peel and mash the bananas in a bowl. If your bananas aren't quite ripe yet, then microwave them for about 30 seconds and you'll have easily mashable bananas in no time!

Mix the bananas and all of the other ingredients in a large mixing bowl until it has all blended. If your mixture looks too dry then add some more vegetable oil. Don't add so much that it makes your mixture greasy.

Shape the mixture into cookie sizes - this is where you can choose to have big chunky cookies or smaller thinner ones.

Cookies before baking
 Bake for 20-25 minutes at 190C/Gas Mark 5 and remove to cool when golden around the edges. Leave to cool on a wire rack. The temperature and amount of time you bake for will vary according to size but you should be able to judge it on when they start looking more cookie-like.

Told you it was easy!


They don't look amazing but it was my first attempt and they do taste really good! Crunchy, oaty with a hint of banana. YUM. The dark bits are the dates so if you don't like the look of them then you could always replace the dates with something else or leave them out altogether.

Enjoy!


Sunday, 19 February 2012

Moules Marinières

First things first, I am not a really experienced cook. I normally do the basics things: lasagne, spaghetti bolognese, stir fry and so on but I'm more of a cupcakes kind of girl. I've been scared about cooking seafood before now, just because I've heard it can go so wrong if you don't do it well. However, I've been wanting to try out cooking mussels and it just happened that Le Bistrot Pierre (who I blogged about a week ago here) sent me a recipe for their Moules Marinières. Me and my boyfriend cooked it together but I will admit he did most of the work and I did some chopping and irritating photo taking! We added some extra things to the recipe just to make it more to our taste, so this is how we did it.

You will need:

3500g Fresh mussels
200g Butter – unsalted
500ml Cream – whipping
400g Shallots or onions
500ml Medium dry white wine
60g Parsley flat (but we used curled)
2 x Lemons (large)
2g Bay leaf
10g Thyme
1 Chilli
3 Cloves of garlic
1 Celery stick
A big crusty baguette to mop up the delicious juice

What we did:

First we cleaned the mussels. If you haven't done this before then this basically involves pulling off the beard (the small bit it uses to attach itself to rocks) and then checking they're all closed. If a mussel is open or cracked then don't eat it!


Then I chopped the lemon, parsley, garlic and chilli in preparation for later. Onion and celery was chopped on another board.


Next, we put the onions, celery, butter, white wine, half of the chilli and the bay leaves into the pan with the mussels and steamed them until they were about half opened. This takes about two minutes. Have a glass of wine while you wait.

Then we added the cream and some of the lemon wedges and let it boil until the mussels opened fully.

When done, we added the rest of the chilli, parsley and lemon wedges and gave the pot a shake until it looked like this...


We served it quickly and ate it immediately so there was no time for pictures! My favourite part was using the bread to mop up the delicious creamy sauce left at the end. I really enjoyed my first mussels experience, especially knowing that I can do that at home easily enough. The only lengthy part is preparing the mussels but after that it's a quick and easy dish to make. It's not really salty and fishy like some people would assume. If it's seasoned correctly then there are so many different flavours. I'll definitely be having this again!


Thursday, 16 February 2012

Guinness cupcakes

This is officially my first cooking post. I've been meaning to post one for ages but I tend to get carried away with the cooking and forget to take any photos! I like seeing photos of the final product so this time I actually managed to take some as I went. I baked these cupcakes as part of a Valentine's day present and they went down quite well!

You will need:

350ml Guinness (about three quarters of a can)
120ml milk
120ml vegetable oil
1 tbsp vanilla extract
3 large eggs (beaten)
170ml sour cream
85g good quality cocoa powder (I used Bourneville)
170g granulated sugar
285g plain flour (you can use half and half with self raising if you want big bouncy cupcakes!)
1 and a half tsps baking soda
pinch of salt


This is what I did:

Preheat the oven to about 180C and put your cupcake liners into a tray.

Pour the Guinness, milk, oil and vanilla extract into a large mixing bowl and beat in the eggs one at a time. Then mix in the sour cream. These are your wet ingredients so don't worry if they're splooshing about in the bowl, they're supposed to!

In another large bowl, mix together the flour, cocoa powder, sugar, salt and baking soda. When properly mixed it will be a big bowl of brown chocolatey goodness.

Now mix this gradually into the wet ingredients.

Your mixture is done! It should be thick and gloopy. Now spoon the mixture into the cupcake liners up to about 3/4 full and put into the oven for 25 minutes.

After the 25 minutes is up, remove from the oven and put on a wire rack to cool.

I cheated a little bit with the icing of my cupcakes because I wanted to make sure they looked perfect. I used icing tubes from Asda (chocolate and white), white chocolate stars and pink sugar glitter.


Let me know if you give them a go!


Wednesday, 18 January 2012

After Eight

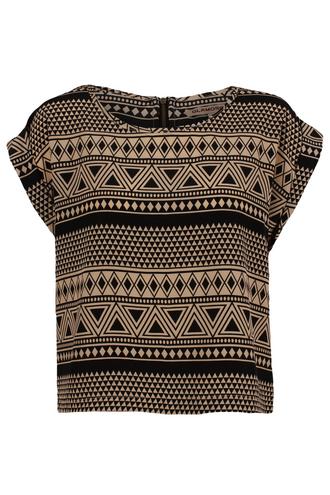
My eight favourite finds from Lavish Alice. As you might be able to tell, I love print, polka dots and patterns. All of these tops could easily be worn with skinny jeans and heels for the weekend or smartened up with a pencil skirt and black cardigan or blazer for work. Obviously the sheer red top with sparkly collar might not be quite so appropriate for work but you could put a layer under it and embrace the sparkle if you so wish!


I think if I could only buy one item then I'd have to go for the tribal shirt (top left) because it could be worn with so many things and the print isn't so stand out that it would look odd. It would be nice in summer with denim shorts and tan sandals.

I've been looking for a dropped hem skirt (like the polka dot one above) for ages! I've seen loads of people wearing them on blogs and they look really stylish but also pretty comfy to wear.

Fashion dreaming done for this evening. The blog title was also a little nod to the fact that I've been desperately craving chocolate for about two weeks now and so far I've managed to hold off, apart from the occasional biscuit.

I don't know where this picture originally came from but I do know that it looks tasty! I'm tempted to make some of these brownies as a treat...

Related Posts Plugin for WordPress, Blogger...